


1. Introduction
In Star Wars universe, ships need to travel faster than light speed to reach other places across the galaxy. It was at any rate a dimension of space-time alternative to that of real space. In hyperspace, the normal laws of space and time did not apply, and beings traveling through hyperspace sometimes used stasis fields to slow the passage of time onboard a hyperspace-going vessel in order to have the pilot only age as fast as the rest of the galaxy. It could only be accessed through molecular displacement, which was achieved by breaking the speed of light. The process created a simu-tunnel, a pocket of real space allowing safe travel through the alternate dimension [1].
In real life, hyperspace does not exist. Anything with mass can’t go faster than light speed. That’s a rule from Einstein’s Special Theory of Relativity [2][3]. The whole hyperspace thing is made up by George Lucas, the director of the first 6 movies of Star Wars franchise. Indeed, he has no clue what a hyperspace should look like. Every movie differs in the way they depict the hyperspace tunnel. Now, in the “Disney era” of the franchise, the hyperspace tunnel effect updated to the version created by J.J. Abrams (director of the Disney Star Wars sequel movie Episode 7 and 9). Based on the settings of Star Wars universe, this paper demonstrated the ways and methods used to recreate the iconic scene via blender.
2. Design of the whole animation
This section is the central part of this paper, mainly explaining the theory and logic behind the scenes. The first part will discuss the creation of the hyperspace simu-tunnel, the second part will elaborate on the arrival of the ship and mainly focusing on the creation of the planet.
2.1. Tracker
Before making any of the animations, there is one thing that needs to be mentioned – the tracker. Creating a tracker for the ship is an important as it saves the time keyframing the movement of the camera. In this paper, the tracker is used for the camera to directly follow and shoot the ship Millenium Falcon [4]. First add an empty plain axis, parent the Falcon to the axes and adjust its position. A constraint property is then added to the camera which allows it to track the plain axes, which is also the ship’s position. The result can be demonstrated instantly. When selecting the tracker and press “G” (grab), the camera will follow the movement of the tracker as it is moved around the space.
In real life, nothing is accurate. There are always defections in human-shot photos and videos. This can be demonstrated by a subtle lag in the tracking. So, to create a slight defection to increase the animation’s authenticity, the influence parameter will adjust from 1 to 0.9.
2.2. Simu-tunnel
This part of the paper is inspired by the hyperspace scenes from Disney Star Wars movie and show footage (Figure 1). The image is unclear due to motion blur.
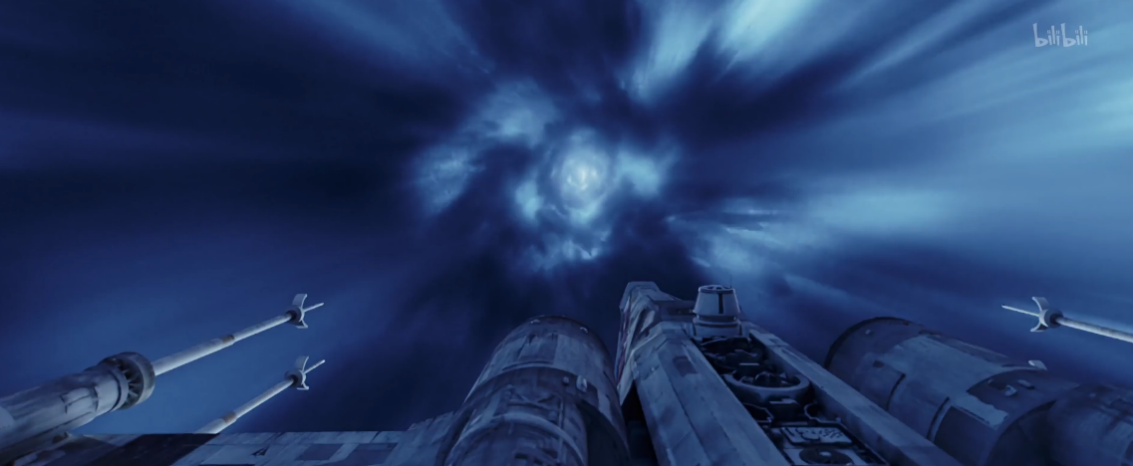
Figure 1. Hyperspace from Rogue One: A Star Wars Story [5]
2.2.1. The basic components of the tube
This tunnel can be realized in blender. The tunnel itself will be a hollow cylinder with the scale (x=500000, y=4000, z=4000), and the white circle in the distance on both ends of the tunnel can be realized by mirroring a glowing UV sphere with the scale (x=1000, y=1000, z=1000) on the ends of the tunnel (Figure 2).
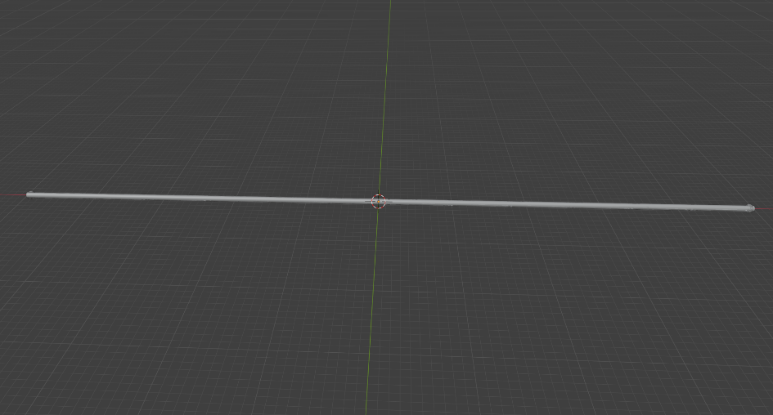
Figure 2. The cylinder with spheres on both ends (Picture credit: Original)
2.2.2. The spheres
The glowing UV spheres can be made by selecting the surface of the material to emission (Strength 246.6) and the color to dark blue (0018FF), as shown in Figure 3.
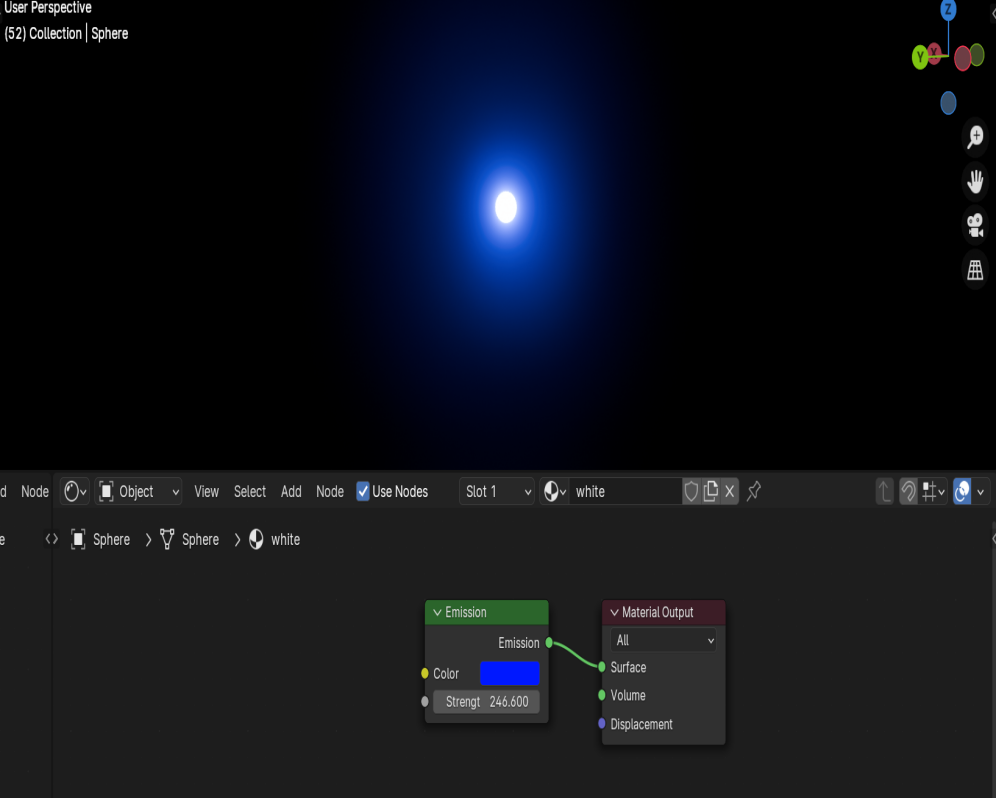
Figure 3. Glowing sphere (Picture credit: Original)
2.2.3. The tunnel
The simu-tunnel is also glowing and needs to cast light on the falcon, so its surface is also selected as emissive. A color ramp is added for future adjustments to the color. The color selected is a lighter blue than the UV sphere (054DB4). Results shown in Figure 4.
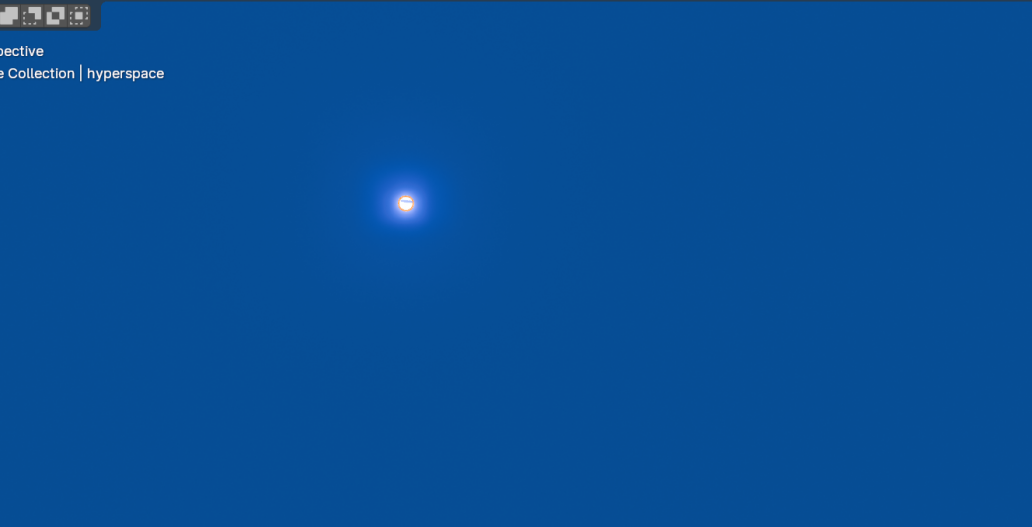
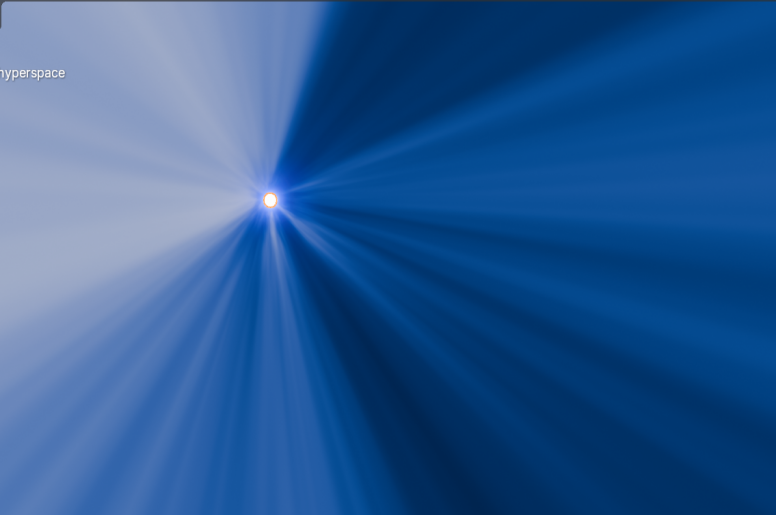
Figure 4. color only (Left) and stripes (Right) (Picture credit: Original)
A noise texture is then added to give the tunnel different patterns of black and white stripes. As shown in Figure 4, this gives the tunnel the major characteristic color distribution of the Disney Version of hyperspace.
As we can see, the left part of the tunnel is bright while the right part is darker. To give a more random and even pattern, a mapping vector is also plugged for further adjustments for the twist and further shattering of the pattern. On the mapping vector, the scale of X value is increased to bring out a shattered pattern along x-axis. This creates the independent white shattered pattern on the tube, as shown in Figure 5.
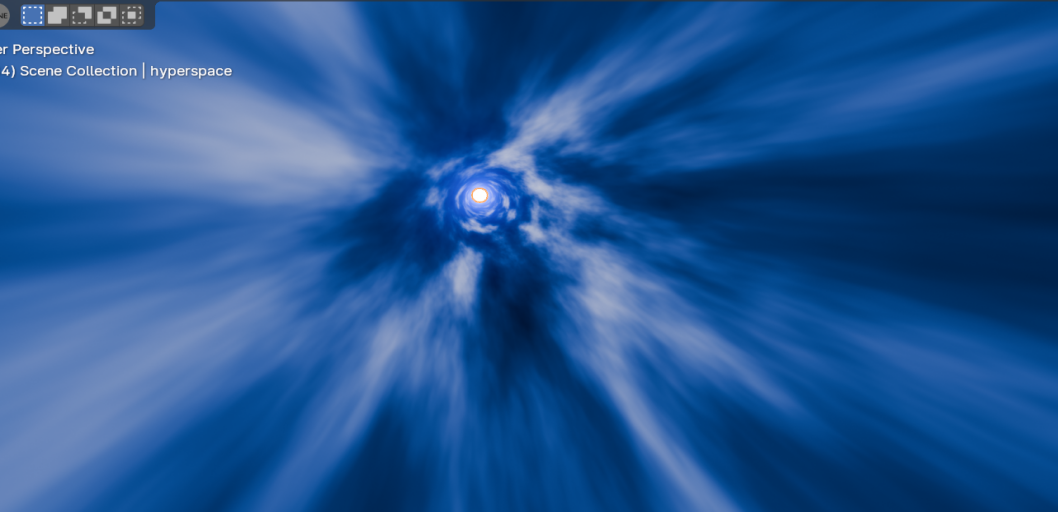
Figure 5. Shattered pattern (Picture credit: Original)
The hyperspace tunnel is a swirling and spinning thing, so by adding a little twist in the pattern, it can look smoother when actually animating the rotation. Thus, a gradient texture is linked to the rotation node and adjusted to give the tunnel a twisted look (Figure 6).
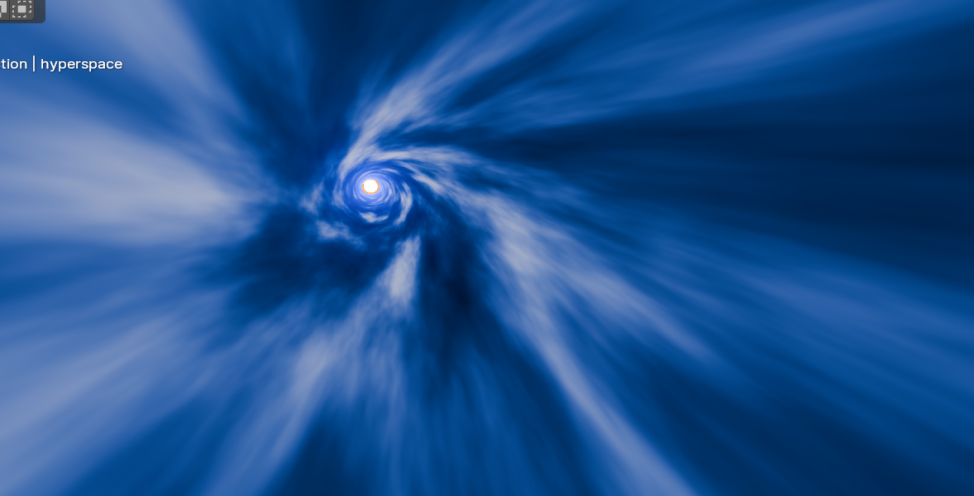
Figure 6. Swirl (Picture credit: Original)
Lastly, the animation of the tunnel spinning can be achieved by adding a Value node on the location node of the whole mapping and by inputting “#frame”, the pattern to spin about the x-axis with a certain degree by every consecutive frame.
2.2.4. Animating the ship
The next step is to animate the movement of the ship, which can be realized by keyframing. By setting the Falcon’s location at one end of the tunnel at frame 0 (press I and save the position and rotation), and setting Falcon’s location at the other end of the tunnel at frame 250, we can animate the simple movement of the ship moving through the hyperspace tunnel as it did in the movies.
The effect can also be improved if we add a slight rotation in the animation of the Falcon. This can make the ship’s movement less rigid.
The whole rendering of this scene is done by render engine Eevee. This is due to the fact that Eevee can yield better exposures of the two UV light spheres.
However, there’s a slight issue here, Eevee has no ambient occlusion, which means that lights from the tunnel can’t reflect on the Falcon, resulting the falcon’s reflecting color to be the same as the background color. To have blue reflections, the background color should be turned to deep blue (0065FF). Which results in this (Figure 7).
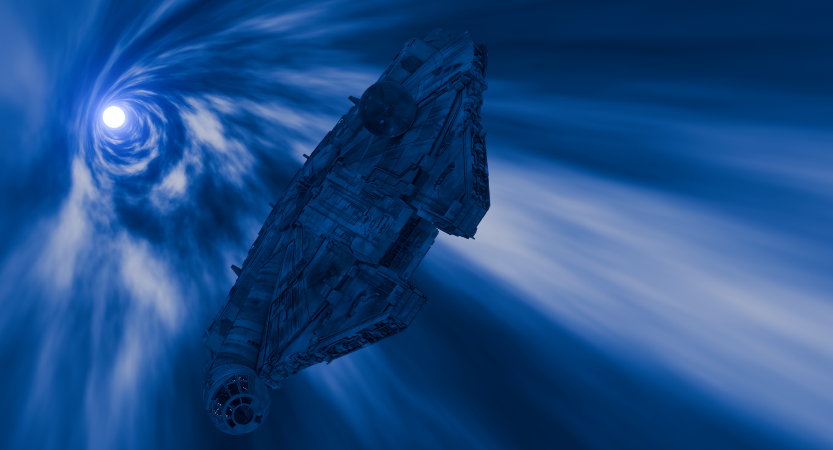
Figure 7. Eevee (Picture credit: Original)
Though theoretically, engine Cycles can yield a better result because it can calculate the exact light reflected on the ship’s surface (Figure 8). However, due to this fact, the two UV-spheres lost their exposure, that’s why they are dull and strange-looking. The falcon also looks quite the same as the Eevee one (Figure 8), and when added motion blur, there is no obvious difference.
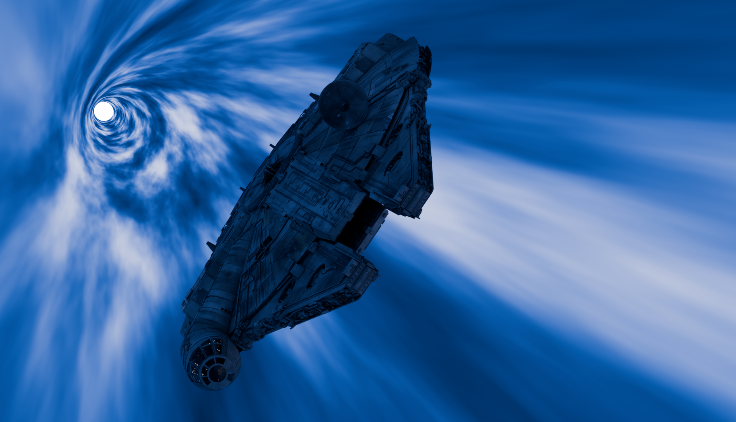
Figure 8. Cycles (Picture credit: Original)
In addition, the speed is ultimately accelerated due to the fact that the video needs to match sound effect.
2.3. Exiting the hyperspace and flying near a planet
In any of the Movies, shows, animations or games in Star Wars franchise, though there are subtle differences in the pattern of the hyperspace, the ways that starships exit hyperspace are always same—suddenly appears out of nowhere.
This paper will use method of keyframing and move Falcon from far away of the camera to right in front of the camera in 5 frames, creating the illusion that the ship has suddenly decelerated from a very high speed. Once arriving at the destination, the ship will drop out of hyperspace and make its way through real space. This part mainly consists of 2 parts, animation of the ship and the design of the planet.
2.4. Animating the ship
We are still using the Millennium Falcon model because it needs consistency with the previous scene. In movies, when ships exit hyperspace, they seen to appear out of thin air due to the tremendously high speed followed by sudden deceleration. So first the ship should be positioned in a very distant place (about 1000m apart from the camera) in frame 1. The result will be the ship looking tiny and difficult to spot (Figure 9).
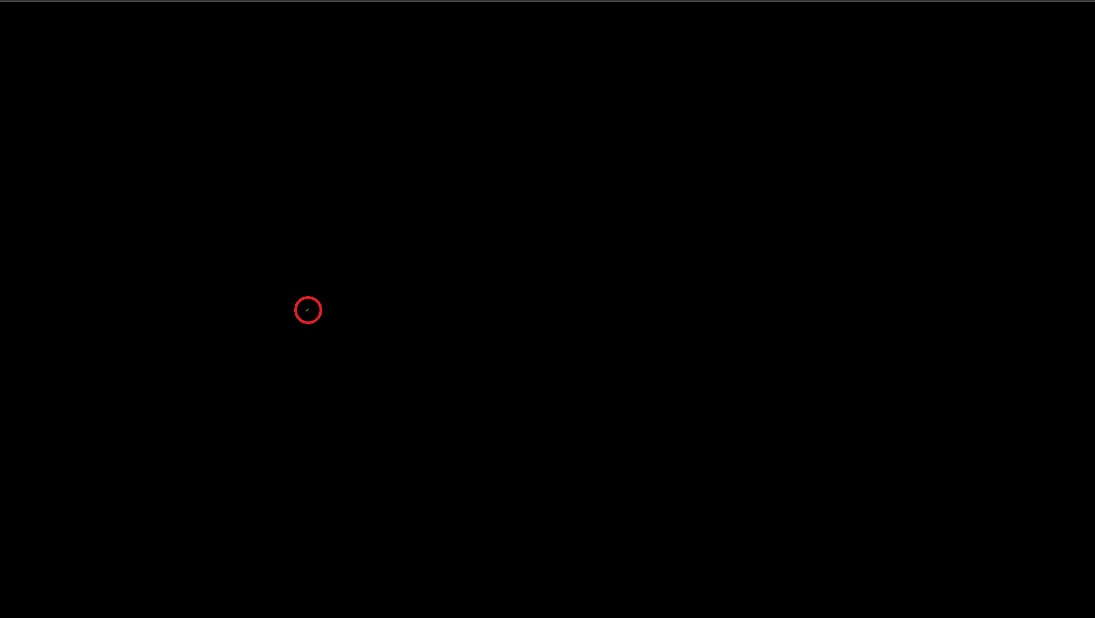
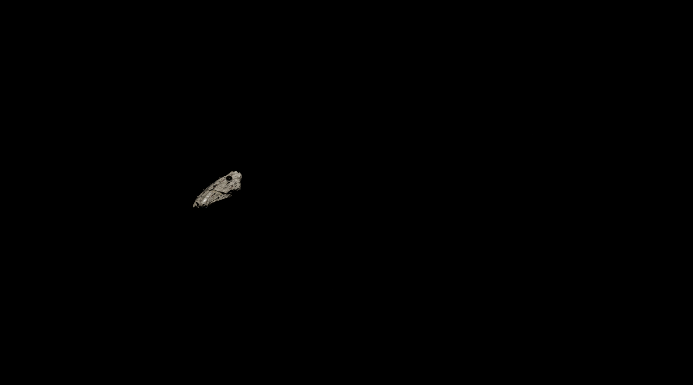
Figure 9. tiny spot and suddenly appearing (Picture credit: Original)
Using the Keyframe method, the position of the ship in frame 5 is set to 38m from the camera. (Figure 9). By allowing the ship to move through a distance of 962m within 4 frames (240.5m/frame), we can demonstrate the extreme high speed and inertia when exiting lightspeed.
To demonstrate the sudden deceleration, the speed of the ship after frame 4 will be slowed, from 38m from the left of the center in frame 5 to 200m from the right of the center in frame 250. That’s 238m in 245 frames (0.97m/frame), which is a huge deceleration compared to 240.5m/frame. These changes in speed can be combined with a subtle adjustment in model scale. The size can be scaled down a bit while in a distance. The resulting effect and create a further illusion of sudden change in speed.To give the ship some movement and make the clip more authentic, this paper decides to allow the ship to rotate slightly during the whole animation, so the movement looks less stiff. This strategy is also applied in the previous hyperspace tunnel scene.
2.5. Designing the planet
There are a lot of planets in Star Wars. However, Neither Disney nor Lucasfilm provide their official planet maps to people. Although third parties do offer texture maps, they are always incomplete and may lead to unexpected issues. This means we can’t use any planets in Star Wars universe. On the other hand, NASA provides free, high-resolution maps for everybody [6]. So here this work used Earth as a substitute. The planet mainly consists of 3 UV-spheres, a sphere each for the surface, the atmosphere, and the clouds.
This work going to use 4 of the maps that NASA provided: the topography map, or the depth map; the texture map, which is the texture of the earth’s terrain; the land-ocean contrast map, a black and white picture that provides data on which part of the world is ocean and which are the land; and the cloud map, also a black and white picture that can be used both as a contrast map and a texture map.
2.5.1. Texture sphere. First, we need a sphere for the textures of the earth. In texture editing, plug the texture map to the base color channel and we will have a result of this (Figure 10).

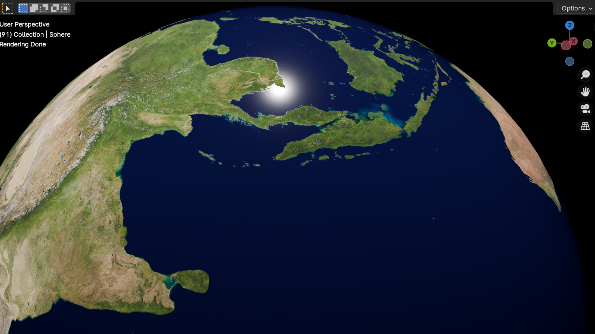
Figure 10. rough surface and Contrast roughness (Picture credit: Original)
Now this isn’t authentic. The land and the ocean are equally roughed. In reality, the land of the Earth should made of solid material, so it will have a dull and rough look. On the other hand, the ocean, which consists mainly of water, should reflect the sunlight and look shinny. So, this work plugged in the land-ocean map (black and white positions on the map will show blender which parts of the texture should be rough and which should be shinny) into the roughness node. This can exaggerate the contrast between the land and the ocean, resulting in the Figure 10 (right).
However, there’s an issue once the Atmosphere sphere (the following paragraph) is added. The blue atmosphere of the color will add on to the deep blue color of the ocean, making the sea even darker. We need to consider this: the ocean appears blue only because it is reflecting the blue sky. In reality, the ocean doesn’t have any color at all, it’s transparent by the shore and reveals the color of the sea floor. But as the sea goes deeper, it turns black because the ocean is so deep that light is impossible to reflect off the seafloor. In orbit, the satellites see the reflection of the sky onto the ocean, which is fake. That’s why we need a node of Hue/Saturation/Value to erase the ocean’s color. In order not to affect the land, the contrast map is reused to tell blender only to turn the color of the ocean colorless (Figure 11).
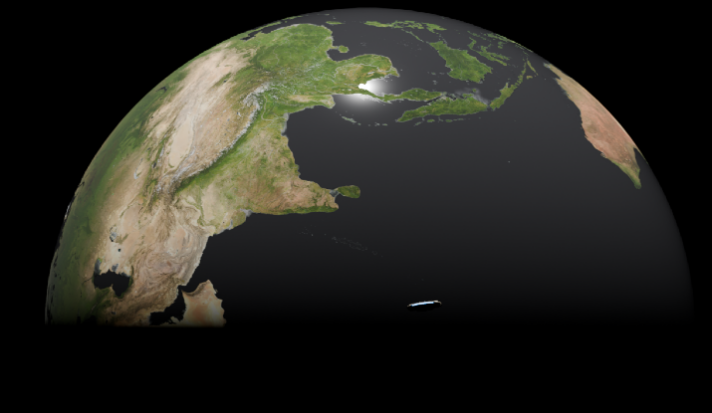
Figure 11. Colorless ocean (Picture credit: Original)
With reference photos, we can see that in space, we can actually see the clear roughness of the surface of the planet that are caused by elevation differences. Thus, the next part is to add depth to the land, like elevating the mountains and lowering the basins. To do this, a displacement node will be needed and plugged with a topography map. An adaptive subdivision modifier is also added to make the elevation more authentic. This yields the following results (Figure 12).
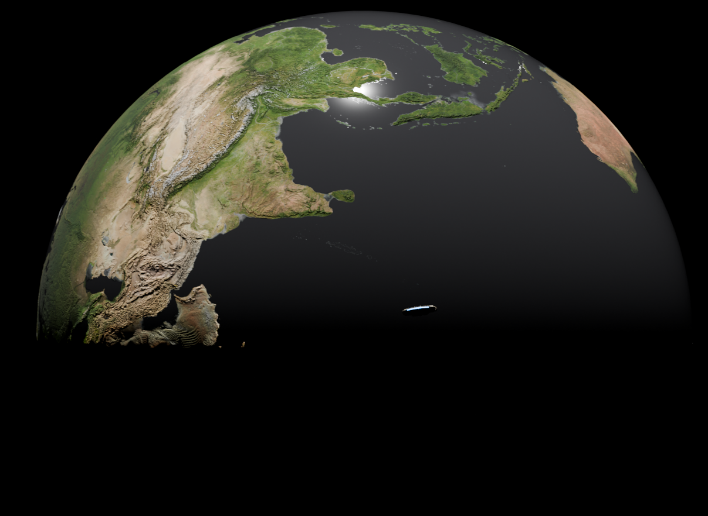
Figure 12. elevation (Picture credit: Original)
2.5.2. Atmosphere sphere. The sphere for the Atmosphere should be slightly larger than the sphere for the planet. In reference photos shot by NASA, the atmosphere can be shown as a faint blue glow around the earth. That’s how we’ll recreate this illusion here. We’ll need a glowing blue sphere around the planet. In addition, the ocean will reflect the blue light from the atmosphere sphere when activating ambient occlusion, so it will be more authentic.
To create the atmosphere sphere, we need a Volume Scatter shader node plugged into the volume output, and the which will result in this (Figure 13).
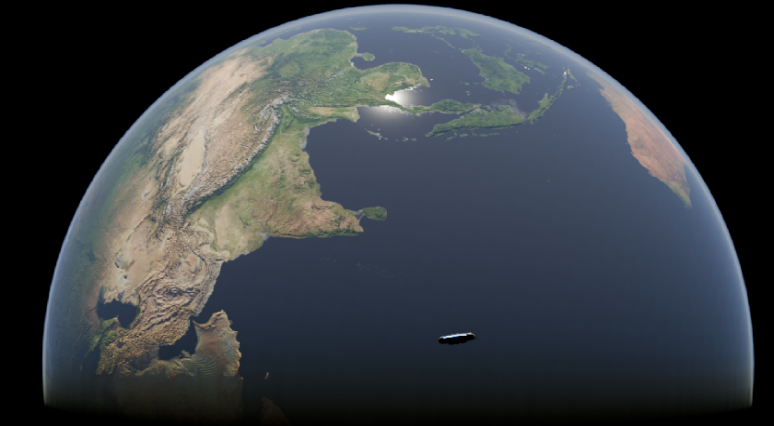
Figure 13. atmosphere (Picture credit: Original)
2.5.3. Cloud sphere. Lastly, the clouds of the earth. Because the clouds are white, the resulting cloud map captured by the satellites is also black and white in color, so it can also be used as its depth map.
First, we need to create a subsurface scattering, which will be the texture of the clouds. As we can see, some of the land is above the cloud level, but most are below (Figure 14).
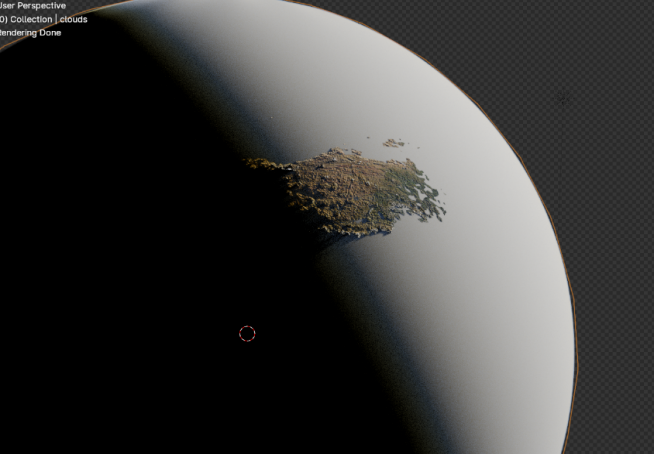
Figure 14. Clouds Picture credit: Original)
Then we need to use the data of the cloud map and apply the white texture (subsurface scattering) to the data provided. Which results in the Figure 15.

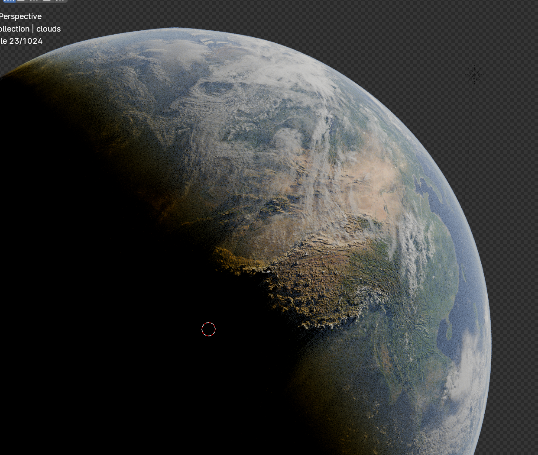
Figure 15. clouds layer and clouds with depth (Picture credit: Original)
Lastly, use the same image of the cloud map and add depth to the clouds (Figure 15). The image is too small and the details are clear when put into the paper, but if we magnify these images and take a closer look (Figure 16).
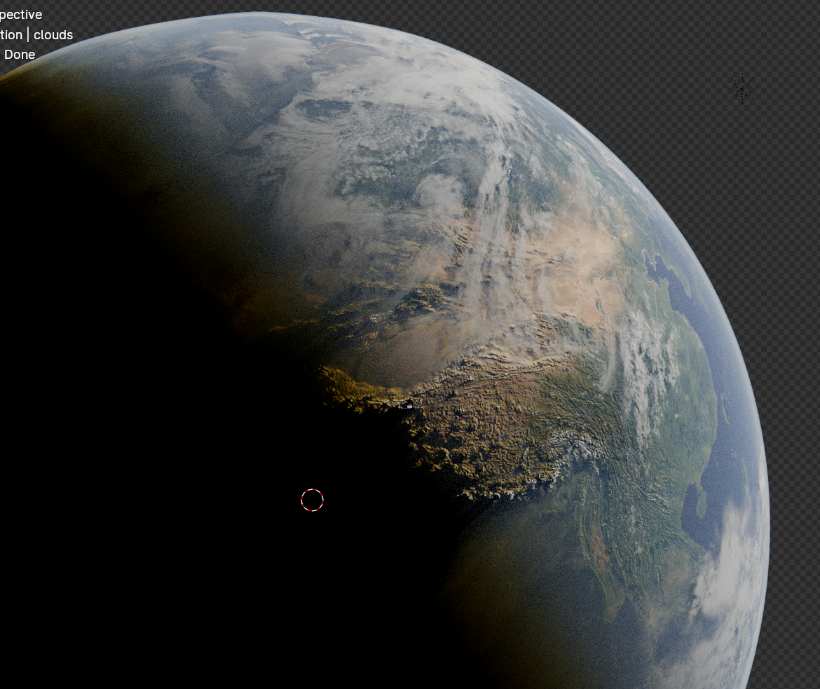
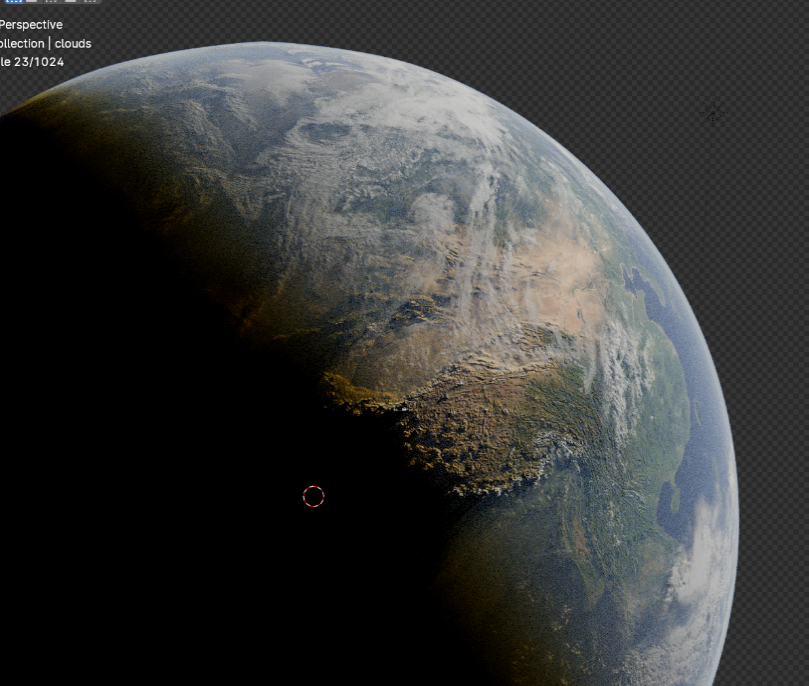
Figure 16. Contrast (Picture credit: Original)
We are able to observe much more detailed pattern of the clouds when added depth(right) than without(left). The rotation of the cloud can be adjusted in order to give a better result.
3. Display
3.1. Result display
The resulting video is done by combining all the 500 (250 for each scene) frames with the video editing mode of blender. Then it is processed with Adobe Premiere and integrated with sound effects from YouTube [7] and Lego Star Wars: The Skywalker Saga [8]. The whole rendering process took about 5 hours total. The most time-consuming part is the rendering of the planet. Here is a link to the video.
3.2. limitations
Blender has 2 rendering engines incorporated into itself, Eevee and Cycles. While Eevee has a huge advantage in rendering speed and better performance, its absence of ambient occlusion and global illumination is still a headache.
Cycles ambient occlusion is based on the distance between surfaces in 3D space (Figure 17). Eevee AO is based on the distance between surfaces according to the 2D image the screen sees [9-11].
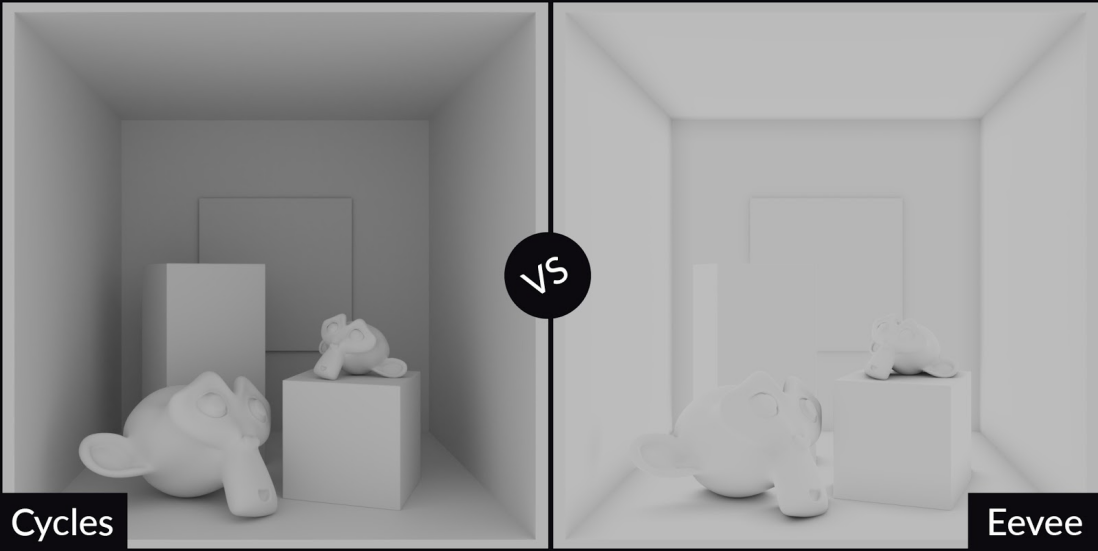
Figure 17. Cycles and Eevee contrast (Picture credit: Original)
That is possibly why the Millennium Falcon in the hyperspace tunnel is in pitch black when rendered with Eevee, but reflecting light with cycles. However, when talking about the two light-emitting balls on the ends of the tube, Eevee has done better. This is because in the Cycles, the glow will only illuminate the parts near the ball. So, from a distance, it is just some ordinary white ball without any exposure effect (Figure 18).

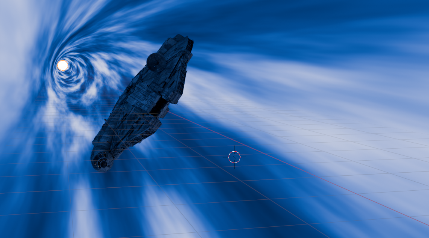
Figure 18. Eevee rendered and Cycles rendered (Picture credit: Original)
4. Conclusion
This paper provides a detailed explanation of the method for recreating the hyperspace jump scene and simple modeling techniques. The research result closely resembles the Disney version of hyperspace. However, the lack of ambient occlusion in Eevee indeed poses certain problems for the authenticity of the work. Looking forward, as technology continues to advance, rendering engine techniques are expected to be continuously improved. It is anticipated that the current limitations of the rendering engines can be addressed by enhancing existing rendering engines or introducing more advanced third-party rendering engines to further improve the quality and realism of rendered results. Furthermore, with the increasing application of deep learning and artificial intelligence, these technologies can be explored to enhance the rendering process for achieving more realistic visual effects. In addition to the technical outlook, future works in creating hyperspace jump scenes could benefit from the incorporation of more audio-visual elements, such as sound effects and music, to enhance the atmosphere and impact of the scenes. Moreover, by integrating VR or AR technologies, it is possible to offer audiences an immersive experience of hyperspace jumps, further enhancing the immersion and impact of the work.
In conclusion, with the progress of technology and the continuous emergence of creativity, the presentation of hyperspace jump scenes will continue to become more enriched and perfected, providing more stunning and captivating audio-visual experiences for film and television works.
References
[1]. Star Wars Fandom. (2024). Hyperspace. Retrieved from https://starwars.fandom.com/wiki/Hyperspace
[2]. Space.com. (2024). Why Don't We Have a 'Star Wars' Hyperdrive Yet? Retrieved from https://www.space.com/39113-star-wars-hyperdrive-light-speed-tech.html
[3]. Space.com. (2024). Einstein’s Special Theory of Relativity. Retrieved from https://www.space.com/36273-theory-special-relativity.html
[4]. Sketchfab. (2024). Millenium Falcon model. Retrieved from https://sketchfab.com/3d-models/millennium-falcon-2c0783d083e44b959c691682b4cb1f16
[5]. Disney Plus. (2024). Rogue One: A Star Wars Story. Retrieved from https://www.disneyplus.com/movies/rogue-one-a-star-wars-story/14CV6eSbygOA
[6]. NASA. (2024). Earth textures, clouds. Retrieved from https://visibleearth.nasa.gov/
[7]. YouTube. (2024). Millennium Falcon sounds. Retrieved from https://www.youtube.com/watch?v=DcZU0MjJcFc
[8]. Warner Bros. Games. (2024). Lego Star Wars: Skywalker Saga. Retrieved from https://lswtss-ttg15.warnerbrosgames.com/en-us
[9]. CG Cookie. (2024). Blender Showdown: Cycles vs. Eevee – 15 Real-Time Rendering Limitations Explained. Retrieved from https://cgcookie.com/posts/blender-cycles-vs-eevee-15-limitations-of-real-time-rendering
[10]. Sutton, G. P., & Biblarz, O. (2010). Rocket Propulsion Elements (8th ed.). Hoboken, NJ: Wiley.
[11]. Wertz, J. R., & Larson, W. J. (1999). Space Mission Analysis and Design (3rd ed.). Torrance, CA: Microcosm Press.
Cite this article
Qi,P. (2024). Mapping and animating Star Wars Millennium Falcon hyperspace jumping base on Blender. Applied and Computational Engineering,76,189-199.
Data availability
The datasets used and/or analyzed during the current study will be available from the authors upon reasonable request.
Disclaimer/Publisher's Note
The statements, opinions and data contained in all publications are solely those of the individual author(s) and contributor(s) and not of EWA Publishing and/or the editor(s). EWA Publishing and/or the editor(s) disclaim responsibility for any injury to people or property resulting from any ideas, methods, instructions or products referred to in the content.
About volume
Volume title: Proceedings of the 2nd International Conference on Software Engineering and Machine Learning
© 2024 by the author(s). Licensee EWA Publishing, Oxford, UK. This article is an open access article distributed under the terms and
conditions of the Creative Commons Attribution (CC BY) license. Authors who
publish this series agree to the following terms:
1. Authors retain copyright and grant the series right of first publication with the work simultaneously licensed under a Creative Commons
Attribution License that allows others to share the work with an acknowledgment of the work's authorship and initial publication in this
series.
2. Authors are able to enter into separate, additional contractual arrangements for the non-exclusive distribution of the series's published
version of the work (e.g., post it to an institutional repository or publish it in a book), with an acknowledgment of its initial
publication in this series.
3. Authors are permitted and encouraged to post their work online (e.g., in institutional repositories or on their website) prior to and
during the submission process, as it can lead to productive exchanges, as well as earlier and greater citation of published work (See
Open access policy for details).
References
[1]. Star Wars Fandom. (2024). Hyperspace. Retrieved from https://starwars.fandom.com/wiki/Hyperspace
[2]. Space.com. (2024). Why Don't We Have a 'Star Wars' Hyperdrive Yet? Retrieved from https://www.space.com/39113-star-wars-hyperdrive-light-speed-tech.html
[3]. Space.com. (2024). Einstein’s Special Theory of Relativity. Retrieved from https://www.space.com/36273-theory-special-relativity.html
[4]. Sketchfab. (2024). Millenium Falcon model. Retrieved from https://sketchfab.com/3d-models/millennium-falcon-2c0783d083e44b959c691682b4cb1f16
[5]. Disney Plus. (2024). Rogue One: A Star Wars Story. Retrieved from https://www.disneyplus.com/movies/rogue-one-a-star-wars-story/14CV6eSbygOA
[6]. NASA. (2024). Earth textures, clouds. Retrieved from https://visibleearth.nasa.gov/
[7]. YouTube. (2024). Millennium Falcon sounds. Retrieved from https://www.youtube.com/watch?v=DcZU0MjJcFc
[8]. Warner Bros. Games. (2024). Lego Star Wars: Skywalker Saga. Retrieved from https://lswtss-ttg15.warnerbrosgames.com/en-us
[9]. CG Cookie. (2024). Blender Showdown: Cycles vs. Eevee – 15 Real-Time Rendering Limitations Explained. Retrieved from https://cgcookie.com/posts/blender-cycles-vs-eevee-15-limitations-of-real-time-rendering
[10]. Sutton, G. P., & Biblarz, O. (2010). Rocket Propulsion Elements (8th ed.). Hoboken, NJ: Wiley.
[11]. Wertz, J. R., & Larson, W. J. (1999). Space Mission Analysis and Design (3rd ed.). Torrance, CA: Microcosm Press.